
Multiselect people picker using Kendo UI with a large dataset

Requirement- In one of our projects we were working on Kendo UI, Angular and, jQuery where we had WCF service as the middle layer and SQL as database. Here we came across a situation where there were more than 75,000 users in the user table. While implementing kendo multiselect for an additional author on page load, drop down became unresponsive and there was an error message due to the huge size of the dataset. We tried to implement kendo’s default server-side filtering, but we were not able to achieve a remarkable improvement in the performance. Solution- We have customized kendo’s multiselect control as people picker, where the user writes three or more characters in the search box and presses enter. The system will make a service call and lists down the limited n. Function Implementation and Description- We have implemented the below steps in the function- · We are getting below details of the users from service – UserImageUrl UserDisplayName UserEmailAddress UserDepartment UserCountry · Create a kendo multiselect control with the specified id and set its default selected value from the second parameter and data source with the third parameter Function Implementation and Description- We have implemented the below steps in the function- We are getting below details of the users from service UserImageUrl UserDisplayName UserEmailAddress UserDepartment UserCountry Create a kendo multiselect control with the specified id and set its default selected value from the second parameter and data source with the third parameter. · For filtering, we are calling the onFiltering function. This function prevents the default filtering behavior of multiselect and makes the global variable canFilter = true when the length of the text we search exceeds 3. function onFiltering(e) { e.preventDefault(); canFilter = true; } When the user clicks enter, it makes a service request and sets the data source for multiselect. Every time the user selects a value from this multi select we are reading all the previously selected values and passing them in the service call. The service is returning all the matching records + all the records which were previously selected. After getting the data from service, we are updating the data source of multi select. This is the method adopted to create a common generic function in a common js file. So, if you want to implement a multiselect people picker anywhere in the application, you just need to call this function with default values and control id.
Sitecore 9 installation on a local development environment

From the time Sitecore 9 was released, there has been a lot of talk about the method of installation. Installing Sitecore 9 is difficult when compared to installing the previous versions, and in this version, you will be using a lot more Powershell. When I was trying to install Sitecore 9.0 in my system, I had to go through multiple website and videos to learn the method. To simplify this process, I have mentioned the steps to be followed for installation of Sitecore 9.0 on a local development environment. Sitecore Experience Marketing Demystified a. Windows 8.1, 10, Server 2012 R2 b. .NET Framework 4.6.2 c. SQL Server 2016 or greater d. IIS 8.5 or 10 e. Java Runtime Environment (JRE) f. Power Shell 5.1+ g. Web Platform Installer 5.0 h. Web deploy 3.6 i. Solr 6.6.2 j. NSSM Steps 1 1. Gather Files: a. Sitecore License file b. On-Prem XP0 Instance package: Sitecore 9.0.2 rev. 180604(download from here) Step 2 • Create install folder c:/Siteocore/install • Move license file to install folder • Extract ZIP file (Sitecore 9.0.2 rev. 180604) and move below file to install folder 1: Sitecore 9.0.2 rev. 180604 (OnPrem)_single.scwdp.zip 2: Sitecore 9.0.2 rev. 180604 (OnPrem)_xp0xconnect.scwdp.zip 3: Extract XP0 Configuration files 9.0.2 rev. 180604.zip file and move all its json file to install folder • Extract Solr 6.6.2.zip file and move to C:/Sitecore folder • Open PowerShell as administrator and move to C:Sitecoresolr-6.6.2bin directory • Run powershell command: o .Solr start -p 8983 • Open browser with URL http://localhost:8983/Solr and check solr is running properly Step 4 • Set up solr as service o Download from http://nssm.cc o Install to C:/Sitecore folder o Open Command Prompt as admin and navigate to C:Sitecorenssmwin64 o Run PS command: nssm install solr6 Under Application Tab fill values: • Path: C:Sitecoresolr-6.6.2binSolr.cmd • C:Sitecoresolr-6.6.2bin • Argument: start -f -p 8983 Under Details Tab fill values • Name: Solr6 • Description: Start/Stop Solr Service Click Install Service button o Open Service Manager to check Solr6 service is created and then start the service Step 5: Configure SSL for solr: • Download solrssl.ps1 from here • Move solrssl.ps1 file to install folder C:/Sitecore/Install • Edit the solrssl1.ps1 file o Open the file in editor o Navigate to $keytool = (Get-Command ‘keytool.exe’).Source o Set the location of keytool.exe to $keytool = (Get-Command ‘C:Program FilesJavajre1.8.0_191binkeytool.exe’).Source • Open the PowerShelland navigate to C:/Sitecore/Install and run the command .solrssl.ps1 -KeystoreFile C:Sitecoresolr-6.6.2serveretcsolr-ssl.keystore.jks o Open C:Sitecoresolr-6.6.2binsolr.in.cmd in editor and Search for this line and remove REM REM set SOLR_SSL_KEY_STORE=etc/solr-ssl.keystore.jks REM set SOLR_SSL_KEY_STORE_PASSWORD=secret REM set SOLR_SSL_KEY_STORE_TYPE=JKS REM set SOLR_SSL_TRUST_STORE=etc/solr-ssl.keystore.jks o Restart solr service o Now run solr as https https://localhost:8983/solr Step 6 Setup SQL Server User • Create a user with new User and provide Sysadmin server role • Execute below code sp_configure ‘contained database authentication’, 1; GO RECONFIGURE; GO Step 7 Install the SIF Module • Open the Powershell as administrator and run below command Register-PSRepository -Name SitecoreRepo -SourceLocation https://sitecore.myget.org/F/sc-powershell/api/v2 Install-Module SitecoreInstallFramework -RequiredVersion 1.1.0 Install-Module SitecoreFundamentals -RequiredVersion 1.1.0 Import-Module SitecoreFundamentals Import-Module SitecoreInstallFramework Step 8 Run Installation Script • Update the parameter in all the script and then run: o $prefix: name of Sitecore instance o $SqlServer: Sql server name o $SqlAdminUser, $SqlAdminPassword: User created in Step 6 Script 1: #define parameters $prefix = “xp1” $PSScriptRoot = “C:Sitecoreinstall” $XConnectCollectionService = “$prefix.xconnect” $sitecoreSiteName = “$prefix.local” $SolrUrl = “https://localhost:8983/solr” $SolrRoot = “C:Sitecoresolr-6.6.2” $SolrService = “solr6” $SqlServer = “DESKTOP-K34H1RL” $SqlAdminUser = “sc9” $SqlAdminPassword=”pass@word1″ #install client certificate for xconnect $certParams = @{ Path = “$PSScriptRootxconnect-createcert.json” CertificateName = “$prefix.xconnect_client” } Install-SitecoreConfiguration @certParams -Verbose #install solr cores for xdb $solrParams = @{ Path = “$PSScriptRootxconnect-solr.json” SolrUrl = $SolrUrl SolrRoot = $SolrRoot SolrService = $SolrService CorePrefix = $prefix } Install-SitecoreConfiguration @solrParams #install solr cores for sitecore $solrParams = @{ Path = “$PSScriptRootsitecore-solr.json” SolrUrl = $SolrUrl SolrRoot = $SolrRoot SolrService = $SolrService CorePrefix = $prefix } Install-SitecoreConfiguration @solrParams Script 2: #define parameters $prefix = “xp1” $PSScriptRoot = “C:Sitecoreinstall” $XConnectCollectionService = “$prefix.xconnect” $sitecoreSiteName = “$prefix.local” $SolrUrl = “https://localhost:8983/solr” $SolrRoot = “C: Sitecoresolr-6.6.2” $SolrService = “solr6” $SqlServer = “DESKTOP-K34H1RL” $SqlAdminUser = “sc9” $SqlAdminPassword=”pass@word1″ #install client certificate for xconnect $certParams = @{ Path = “$PSScriptRootxconnect-createcert.json” CertificateName = “$prefix.xconnect_client” } Install-SitecoreConfiguration @certParams -Verbose #deploy xconnect instance $xconnectParams = @{ Path = “$PSScriptRootxconnect-xp0.json” Package = “$PSScriptRootSitecore 9.0.2 rev. 180604 (OnPrem)_xp0xconnect.scwdp.zip” LicenseFile = “$PSScriptRootlicense.xml” Sitename = $XConnectCollectionService XConnectCert = $certParams.CertificateName SqlDbPrefix = $prefix SqlServer = $SqlServer SqlAdminUser = $SqlAdminUser SqlAdminPassword = $SqlAdminPassword SolrCorePrefix = $prefix SolrURL = $SolrUrl } Install-SitecoreConfiguration @xconnectParams Script 3: #define parameters $prefix = “xp1” $PSScriptRoot = “C:Sitecoreinstall” $XConnectCollectionService = “$prefix.xconnect” $sitecoreSiteName = “$prefix.local” $SolrUrl = “https://localhost:8983/solr” $SolrRoot = “C: Sitecoresolr-6.6.2” $SolrService = “solr6” $SqlServer = “DESKTOP-K34H1RL” $SqlAdminUser = “sc9” $SqlAdminPassword=”pass@word1″ #install client certificate for xconnect $certParams = @{ Path = “$PSScriptRootxconnect-createcert.json” CertificateName = “$prefix.xconnect_client” } Install-SitecoreConfiguration @certParams -Verbose #install sitecore instance $xconnectHostName = “$prefix.xconnect” $sitecoreParams = @{ Path = “$PSScriptRootsitecore-XP0.json” Package = “$PSScriptRoot Sitecore 9.0.2 rev. 180604 (OnPrem)_single.scwdp.zip” LicenseFile = “$PSScriptRootlicense.xml” SqlDbPrefix = $prefix SqlServer = $SqlServer SqlAdminUser = $SqlAdminUser SqlAdminPassword = $SqlAdminPassword SolrCorePrefix = $prefix SolrUrl = $SolrUrl XConnectCert = $certParams.CertificateName Sitename = $sitecoreSiteName XConnectCollectionService = “https://$XConnectCollectionService” } Install-SitecoreConfiguration @sitecoreParams After Successfully running below scripts, you can access Sitecore site using http://xp1.local URL This method can be followed for installation of Sitecore on a local development environment. You can also view Sitecore Multisite Architecture – Single Installation. In case of query, add your comments below.
Build FAQ Knowledge Base with QnA Maker

In my last article “EVERYTHING ABOUT MICROSOFT QnA MAKER”, I have explained what is Microsoft QnA Maker service and how it helps to create an effective knowledge base from your existing FAQ pages and documents. In this blog I will explain the steps to create QnA Maker service to build a knowledge base which can be consumed in the chatbot directly. Login to QnA Maker and Sign-in using Microsoft Live Account Click on Create new service. Provide SERVICE NAME, it can be changed later as well. This field is mandatory and it will appear as a Bot response. QnA Maker provides three ways to enter your FAQs. We can use any one method or combinations of all three methods as per the requirement. a. URL: In case your FAQs are listed on a web page, enter URL(s) for the same. Using + Add another option, you can add one or more publicly accessible FAQ style page URLs. Using this URL, QnA service will gather relevant data and extract QnA pairs that you can later use in your bot. b. Files: In case of FAQ are listed in a file locally. You can easily upload single or multiple files (up to five files), each should be under 5MB. Files can be either FAQ pages in .tsv, .pdf, .doc, .docx and .xlsx format or product manuals in .pdf format. To upload files, click on Select file… You can create your own FAQ file using “.tsv” format as shown in the below image (Highlighted in Yellow are Questions and the respective answer is in green separated by tab): c. Manual Entry: If you want to enter questions manually, QnA allows you to enter queries manually as well. Click on Create. Now QnA will crawl your links and documents and create a knowledge base. After few seconds, Knowledgebase is ready and allows you to correct and update the same. 1. Knowledge Base Tab, showing all Questions and Answers extracted from defined sources. 2.Test the Bot request response, with all potential matches. 3.Settings, display all the settings, like Service name, URL entered. 4.Edit Question and Answer. 5.Save and train with all modified changes. 6.Publish, will be available with public HTTP URL. 7.Add new QnA pair, to add the new set of questions and answers. 8. Delete QnA pair, to remove unwanted QnA pair.Testing the serviceNow after confirming knowledge base, now test the bot request response using the following steps: Click on Test option in the left navigation. The Test service allows you to test all the Bot request and response. Even you can add multiple alternative phrasings to the question. On each response, it will show available appropriate answers from the knowledge base and allows you to choose the most appropriate answer from these answers. After correcting all mappings and adding new alternative phrases, to test with updated data, click on Save and retrain option to retrain the service. Now you can again confirm your mappings. Finally, when all the data is confirmed, click on Publish. You will see a confirmation screen. Click Publish again. You will then be presented with the information needed to consume the Bot. To again get deployment details, click on My services, selecting the service, then click on Settings. This is all about how you can leverage QnA Maker service to convert existing FAQs into the knowledge base with minimum efforts. Now the time is to consume this knowledge base into chatbot application. In the next article, I am going to explain how we can use the Azure Bot Service to setup our FAQ chatbot and consume this knowledge base.
How to create Quick Email Campaigns with Microsoft Dynamics CRM?

A quick campaign is used to send a single activity to a list of contacts or accounts in your system. The activity could be an email, series of phone calls, letters, faxes or appointments. Quick campaigns are created from ‘Marketing Lists’ within the CRM. So, to navigate to your Marketing Lists, we go to the ‘Marketing’ tab (orange tab) and go to Marketing Lists and highlights/select the one we need. We already have a test list created here. Once your choice of marketing list is highlighted, you simply click Create Quick Campaign icon on the top of the screen which will open the Create Quick Campaign wizard. The user simply needs to follow the below steps to create a campaign. So, click on Next. And give your campaign a Name. Click on Next. And you can specify the Type of Activity you want to create. Is it a Phone calls, Appointments, Letters, Faxes or an Emails? Well let’s say it’s Emails. And then I can assign who I want these activities to belong to. So, who will the emails be sent from. So, I can specify it to be me, the person who has created the campaign. I can specify the owners from the record, so it could be the account manager of each of those contacts. We could also assign the activity to any other member of the user or team or we can add the activities to the queue. I want to assign it to me, so I click on that. And I also want the email messaged to be sent and the corresponding email activities to be closed so I will also highlight the last check box and click Next. I can then start to build my email if I wish by entering the subject and the text of the email. Rather than doing that though you can also use one of the templates so highlight Use Templates. We can then specify which template do I want to use. For instance, you want to use the already available templates say Chaos to Insights (that I have built), go ahead Select it. You can also create your own template per your needs. If you want to learn how to create customized email template in Microsoft Dynamics CRM, visit our blog archives or simply click on the link highlighted. If you want a quick preview of the pre-built template, simply click on the template name. It will show you the entire content of the email. You will see mail merge field have been used highlighted in yellow. Once you’re happy with the current template, so simply close that and click Next. This gives me the quick summary of my campaign. If I click Create, that will create my new quick campaign. To view the campaign success or failure, on the Marketing Tab, go to Quick Campaigns, and here is the quick campaign. Now we can see that the email was sent to a total of 4 members which were successful, and the campaign is now complete which means all the emails have gone.
How to create an email template in Microsoft Dynamics CRM?

In Microsoft Dynamics 365. An email template serves as a framework for an email message which helps you to maintain a consistent layout and message. You can create an email templates that can be used by all the users in your organization. In this tutorial we will tell you how to do so. We begin by navigating to Settings
How to get the missing Project Server 2016 user views from PWA database

Installing SharePoint updates in Project Server 2016 environment sometimes lead to missing Project Server user views in content database.
WCF Service on Top Of SharePoint 2016
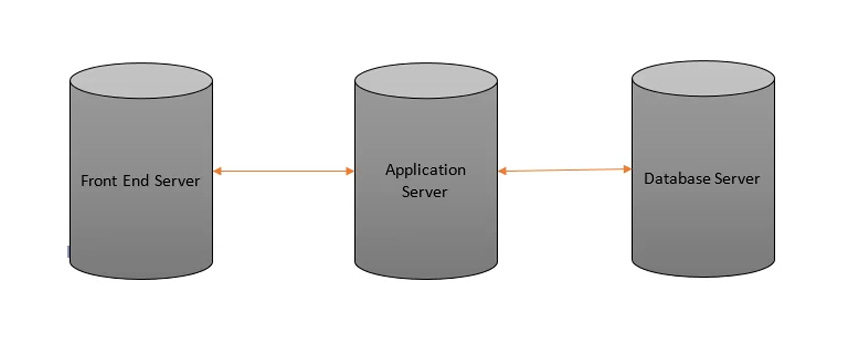
In this post, I’m going to discuss about WCF service and how WCF service can be developed on top of SharePoint. WCF service works as an individual component that can be hosted on any environment and has no platform dependencies
Auto-publish projects in MS Project Server/Project Online using PowerShell

There are times when the project manager forgets to publish the project or don’t have time, which affects the project plan. In this post, I share a script to auto-publish projects in MS Project Server/ Project Online. Read more.
Project Service Automation(PSA) Programming in Dynamics 365

With programming, Dynamics 365 data can be accessed to create SSRS reports or Power BI dashboards. This blog post talks about the steps to do any kind of custom development in Dynamics 365.